 |
|
||
|

|
|
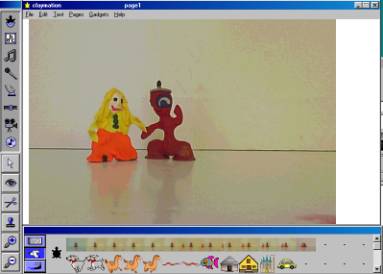
How to Make a MicroWorlds Claymation 1. Design a small number of posable characters out of clay. 2. Photograph the characters one motion at a time.
3. Get the pictures into the computer (and save them).
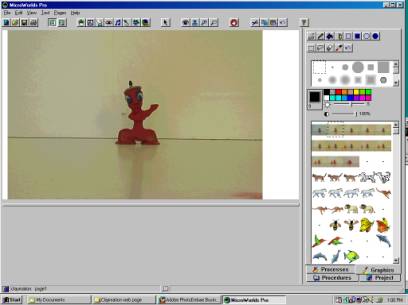
4. Paste each photo into the MicroWorlds shapes center/graphics tab. 5. Animate the photos. Steps 1 and 2 may be tedious, but are technically simple. Start out with a simple plot with few characters. Kids will amaze you with what they will produce. Step 3 requires you to import the photos into your computer via capture software, a scanner or Photo CD. It's not a bad idea to number the photos in a consistent way like, photo1.jpg, photo2.jpg, etc... Placing the files in the same folder with MicroWorlds will help you find them if you are less comfortable with ugly path names. Step 4 requires some fluency with cut and paste (the doctoral level of computer literacy). The goal is to turn each photo into a MicroWorlds turtle costume. If you can figure out a way to paste each successive image into the MicroWorlds shape center/graphics tab, then you can ignore the rest of this step.Strategy 1 (high-tech solution for project with lots of frames)
to
getshapes :number Strategy 2 (open the photos in a graphics program and switch between MicroWorlds and that application)
Step 5 is the simplest step of all and demonstrates the elegance of MicroWorlds/MicroWorlds Pro. This project can be easily completed by a very young child. However, like all programming projects you may make the program more complex. 1. Hatch a turtle and put it in the center of your page (you may use the home command) 2. Click on the first shape in your animation photos 3. Click on the turtle to make the turtle wear that costume 4. With the shift-key held down repeat steps 2 & 3 (above), but change to the next shape in your shapes center/graphics tab until you run out of photos for your animation. This is a cool trick to tell MicroWorlds to change shapes every time it gets a forward or back instruction. You can of course write a procedure containing lots of setsh commands if you are a rigid old Logo programmer who doesn't like to make life too easy on yourself. 5. Click the eye tool or right-click (Ctrl-Click in MicroWorlds Pro for the Macintosh) on the turtle to edit it. 6. Type the instruction FD 0 wait 4 into the instruction field and choose MANY TIMES. THAT'S IT! FD 0 counts as movement, but stays in place - thereby changing the turtle costumes automatically. You may wish to adjust the input to wait to change the pace of the animation. 7. Click on the turtle and premiere your claymation!!
to animate Go make something! |
| Home
| Search |Articles
| iMovie | Bookstore
| Bio | Booking
Gary |
|||
| Copyright © 2003-2007 Gary S. Stager - All Rights Reserved. |