21st Century Logo Quilts
© 1999 Gary S. Stager
Back in the eighties, a popular Logo activity was to have kids make quilts with turtle graphics. This project lends itself to collaboration, mathematical problem solving, creativity and folk lore. Students can tell stories through their quilts and the act of assembling a Logo quilt requires the communication of geometric relationships to the computer. Find a simple collaborative MicroWorlds quilting project starter here.
For those of you interested in exploring "old-fashioned" Logo quilt making with your students, follow the following instructions.
- Agree on a size for the basic block. 80X80 turtle steps is a good size.
- Write a BLOCK procedure to draw the outline of the patch.
- Write patch procedures in which
- all of the drawing occurs within the walls of the patch
- the turtle always returns to where it began - heading in the original direction. This state transparency allows for the next block to be drawn predictably. In Logo as in life, it is good to return to where you began.
- Name each patch procedure with the initials of the programmer and a number, ie... gs1, gs2...gs5, etc. This system of unique naming makes it possible to share procedures to build common quilts.
- Experiment, have fun, use color
- Write procedures to randomly assemble new quilts.
 |
Dan and Molly Watt wrote extensively about teaching and learning with Logo. Their book, Teaching with Logo... takes an indepth look at quilt making with turtle graphics. Ideas for understanding student learning and assessing that learning may be found in the book listed below.
Teaching with Logo: Building Blocks for Learning |
The following are some sample procedures for making old-fashioned quilts. The illustration above was created with these self-explanatory procedures. The move.r, move.l, move.u and move.d procedures are intended to slide the turtle so another patch may be created.
|
Old-fashioned Quilt Starter Procedures
|
to block
setc "black
pd
repeat 4 [fd 80 rt 90]
end
to gs1
block
rt 45 fd 113
bk 113 lt 45
end
to gs2
gs1
fd 80 rt 90
gs1
lt 90
bk 80
end |
|
to move.r
setx xcor + 80
end
to move.l
setx xcor - 80
end
to move.d
sety ycor - 80
end
to move.u
sety ycor + 80
end |
Quilting MicroWorlds-style
The modern interface of MicroWorlds invites learners to create their own quilting software. In this project we will
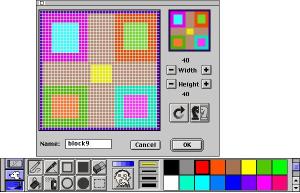
- design geometric (and non-geometric) quilt patches as turtle costumes in the shapes centre
- ask stationary turtles to behave as buttons
- move a patch into position and stamp its shape on the screen in order to assemble a mosaic-like quilt
Step One - Design the Patches
- Change turtle costumes to appear as quilt patches. Be sure to use the same size square in each shape.
- Name the shapes, block1, block2, etc.. to reduce confusion.
- Use your imagination, color, creativity and don't forget that you can rotate costumes in the shapes centre. Copy and paste may also reduce your workload while creating new patches.
Step Two - Create the Control Buttons
- Hatch a turtle per patch you created
- Put a different patch shape on each turtle
- Line the turtles up vertically along the side of the page or horizontally along the top/bottom of the page.
Step Three - Program the Turtle Buttons
- Use the eye tool to give each of these turtles the instruction Changeblock "block1 where block1 is the name of the shape attached to this turtle. Check ONCE in each turtle's instruction.
Step Four - Create Buttons
- Drop a MicroWorlds button with the ONCE instruction STAMPIT on the button.
- Drop a MicroWorlds button with the ONCE instruction CLEAR on the button.
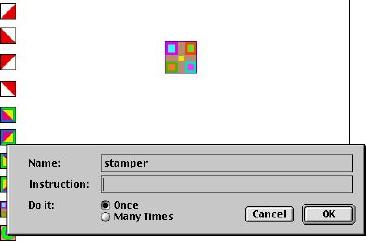
Step Five - Create the Stamping Turtle (cursor)
- Hatch one more turtle.
- Name it STAMPER. It does not need any instructions.
Step Six - Create the Navigational Buttons
- Drop four buttons on the page.
- Arrange the buttons in compass directions.
- Give each button the once instruction North, South, East and West. (one each) You can't use up and down because right and left are already Logo primitives.
Step Seven (optional) - Compose a Click Sound
- Drop the melody tool on the page
- Create a one or two quick note click sound to add to your stampit button.
Type the following procedures on the procedures page:
to clear
clean
stamper, pu home
end
to stampit
stamper, stamp
click
end
to changeblock :costume
stamper, setsh :costume
end
to north
stamper,
seth 0
pu fd 40
end
to south
stamper,
seth 180
pu fd 40
end
to east
stamper,
seth 90
pu fd 40
end
to west
stamper,
seth 270
pu fd 40
end
Try my sample quiltmaker below. Click Clear to wipe the screen clean. Click the navigational buttons to move the stamper. Click stampit to leave the patch on the screen.
Click on the screenshot below to learn how you can replace the navigational buttons with graphical arrows...
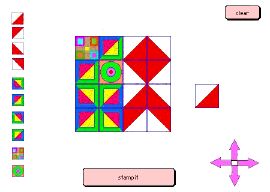
|